I hate being cold. That being said , what is a girl to do during winter? (besides long sleeves and mittens?) Well, I noticed my daughter wearing "cuffs" a lot in her late teens and as a young adult. Maybe I am too old for such a fashion accessory, but seriously ...."who cares?" I am about comfort and being blissfully happy with what I am wearing...( that means sexy, and or cute, AND comfortable)
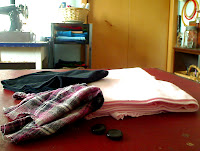
I started with gathering some recycled t-shirts and flannel. I also re-claimed 2 large black buttons from my button jar.
I measured out a pattern for 9" x 3". This is just a basic size. I suggest measuring your wrist and adding 3" or so. This gives plenty of room for seam allowance and overlap.
Next, I pinned my pattern piece to the pink and black knit cutting out 2 pieces each.
I cut a strip of the accent flannel and simply pinned it in place. I am leaving the edges so I can fray them a bit.
Then I sewed it in place with a 1/4" top stitch.
This is a narrow black elastic cut to 3 1/2" for looping the button. I chose elastic because of its ability to stretch. My button is 7/8".
I then tacked it into place on the right side of the pink knit.
I pinned the two colors right sides together leaving a small opening for turning.
Using a 1/4" seam I stitched around entire cuff with exception of the opening for turning inside out.
Now to trim seams and cut corners.
Then to turn inside out, and press the cuffs with an iron .
Next, I slip stitched the openings closed.
I sewed on both buttons at approximately 2" from edge.
And ta-da!
Here they are on . I love them! It is my hope these instructions are simple and useful.
Let me know if you make any and how they come out. I would love to see pictures and share. They are really fast to make and feel sooooooo good!!!
as always,
create with Joy!
Tammy


No comments:
Post a Comment