

I love creating "stuff" from other "stuff". I love sharing it even more!
Easy and fun and makes a great gift for just about anyone on your list!

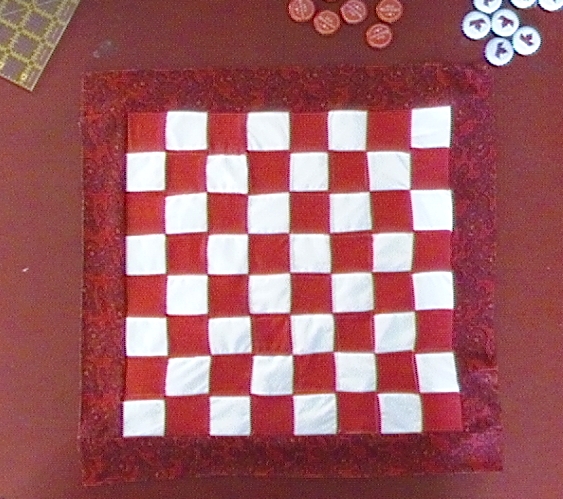
Start with cutting out 2 sets of 2"x2" squares. I chose red (my favorite summer shirt that had a few holes in it) and white. Cut 32 of each color.
Next start sewing your squares together using a 1/8" seam ( all seams are 1/8" throughout this project). I laid out 8 rows of 8 squares alternating colors.After you have sewn all 8 rows start sewing the rows together. Above I have 2 rows pinned together ready to sew.

When all 64 squares are sewn you now have a checkerboard!
And, for those of you that are perfectionist....don't use knits! Ug! I got a few funky looking squares, but decided to allow for the imperfections and added "charm" to my project.

I chose to top stitch the checkerboard and used a piece of flannel cut to size of 14"x14" as a stabilizer for my stitches. It worked well, especially because of the red knit pieces that were a little funky, I could stretch them out a bit and reshape them. I was happy with it.

For the boarder I used another knit I had and cut strips of 2". Pieced a few together to get a length of 56". Laying the edges right side together, sewing one side at a time and trimming it to size after each side was sewn.
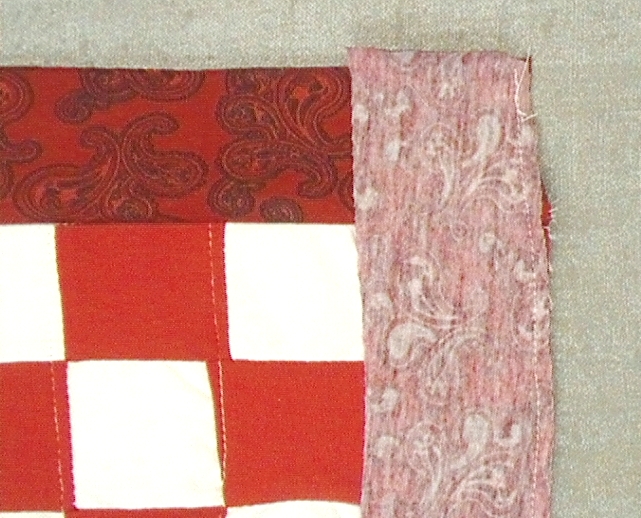
Press open BEFORE laying the piece for the next side.

Press as you go.
With boarder done I laid the checkerboard face down on a recycled black tee and cut it to size. Stitching around the the entire piece , leaving a small opening to turn it right side out.

My measurement at this point was approximately 16"x16".

After you have slip stitched the opening closed ...You have a checkerboard!

Making the small pouch is quick and easy. I chose the same white as I used in the checkerboard. It was actually a sheet that just served its purpose. Perfect for projects! I cut 1 rectangle 7 1/4" x 14 1/2". I then folded and press a 2" edge on the top. before sewing pouch together , I placed a couple pieces of small elastic along the edges to use as ties.

One set of my bottle caps is Canadian Molsen beer and has a maple leaf on them so I thought it would be fun to use heat and bond and felt to duplicate the leaf onto the pouch.

Ironed on and ready to top stitch with floss!

Done! How about that? It was quick, fun, 100% recycled!
If, you make one , I would love to see it! If you like this project please share it.
as always,
create with joy!
Tammy
No comments:
Post a Comment